Eden Isle Chicken

In the midst of Skyping with my new Scottish friend Shaun and his sweet wife Dawn, baking cookies for the girls bake sale for charity and getting ready for Easter…. dinner still had to be made.  Here’s another easy chicken recipe and OMG, so tasty!  Anything with bacon, chicken, cream cheese and sour cream HAS to be good, right?

Eden Isle Chicken

Ingredients:

6 chicken breasts, fat trimmed

1 lb package of smoked bacon

1 jar of dried beef

1 1/2 ups sour cream

3 oz cream cheese

2 cans cream of chicken soup

black pepper

2 tsp dried thyme

Directions:

Preheat oven to 325 degrees.  Wash and dry the chicken breasts.  Sprinkle top and bottom of each breast with pepper (NO salt).  Wrap each breast in bacon.  Place the dried beef in the bottom of a greased 9×13 baking dish.  Arrange the bacon wrapped chicken on top of dried beef.  Meanwhile, mix sour cream, softened cream cheese, soup, black pepper and thyme.  Pour mixture evenly over chicken.  Cover dish tightly with foil.  Bake for 2 hours.  Now warm oven to 400 degrees.  Uncover dish and bake until slightly browned on top (approximately 10 minutes).  Serve with rice.

*Some people serve over a bed of mashed potatoes or pasta.

Restaurant Style File Mignon

You guys HAVE to know the secret to the absolute BEST way to do filet mignons!  It has NOTHING to do with the grill, either.  *shock*  Actually, any of my “foodie” friends may already know this but it’s something new to me and I feel compelled to share 🙂  I teased you with a pic on my hubby’s birthday post.

This is a revised recipe I got off of Pinterest.  If you haven’t tried cooking steaks this way, PLEASE do yourself a favor and give it a whirl.  I PROMISE you that all your family and friends will think you’re the bomb!  You know how you go to your favorite steak house and the steak is better than anything you could grill, ever?  Yeah, this is how you do it!

Restaurant Style Pan Seared Filet Mignon

Ingredients:

4 8 oz filet mignons

4 tsp sea salt

8 tsp freshly cracked black pepper

2 sticks butter

2 TBSP olive oil

4 cloves chopped fresh garlic

2 TBSP dried parsley

2 TBSP dried thyme

Zest of 1/2 lemon

Directions:

Take 1 stick of butter, softened.  Mix well with garlic, thyme, parsley and lemon zest.  Form into a log and chill.  Generously season each side of the filets with salt and pepper (approximately 1 tsp of BOTH salt and pepper per side – TRUST me, it sounds like a lot of salt but the salt acts to form the crust on the steak and you really DO need it).  Heat the other stick of butter and the olive oil in a CAST IRON skillet to a SCREAMING HOT temperature.  Preheat oven to 400 degrees.  Sear the filets in the extremely hot skillet for about 2 to 3 minutes per side, or until a nice brown crust forms.  While the steaks are searing, continuously spoon the butter from the pan on top of the steaks.  When the steaks are done searing, place in the preheated oven (center rack) in the same cast iron skillet.  Cook for 6 to 8 minutes or until the temperature reads 135 degrees (medium rare).  During the last minute of cooking, take that delicious herb butter that should be chilling and glob a generous dab of butter on each steak.  The butter won’t be melted ALL the way when you’re ready to take out of the oven.  Let steak sit for 5 minutes before you serve.  The juices will stay inside the steak this way.

*135 degrees is medium rare.  Obviously not everyone likes the cows to be still mooing so cook a little longer if you don’t like that much red.  I think if you’re going to spend the money on filet mignon, you shouldn’t over cook it.  You’ll want that tender flavor.  135 degrees is PERFECT for us 🙂

Harvest Cheesy Potatoes

As I mentioned, last night I made Oven-Fried Buttermilk Chicken.  I had to have some kind of starchy yumminess to go with it,right? Glad you agree 😉

Harvest Cheesy Potatoes

Ingredients:

5 cups peeled and cubed OR grated potatoes

2 cans cream of chicken soup

1/2 cup (1 stick) melted butter

2 tsp creole seasoning (you can use any kind of season salt)

1 medium onion, chopped (optional)

1 cup sour cream

2 cups shredded sharp cheddar cheese (or throw in an extra handful like I always do!)

1 cup panko or regular bread crumbs mixed with 2 TBSP melted butter

OR you can top with cornflakes or potato chips

Directions:

Combine potatoes, soup, butter, season salt, onion, sour cream and cheese.  Pour into a greased 9×13 inch pan.  Top with bread crumbs, cornflakes or potato chips (1 cup).  Bake at 350 F for one hour.

This was SO good!

Italian Herb Butter

Remember my love for all things butter and how we talked about Paula Deen being my hero?  I thought it would be a good time to share with you a recipe for Italian Herb butter.  I’ll be using it over either asparagus or broccoli tonight.  The flavor won’t conflict with the Rosemary Chicken that we’re having tonight.

THIS is how to dress up boring vegetables.  I’m always trying to come up with something BESIDES the regular cheese sauce or just plain ole butter.

Besides, it gives me an excuse to use my cute little butter crock!

Italian Herb Butter (from my Aunt Betty’s handwritten recipes)

Ingredients

1/2 cup softened, salted butter (1 stick)

1 TBSP chopped fresh basil

1 TBSP chopped fresh oregano

1 clove garlic, minced

Directions:

In a small bowl, combine all ingredients.  Pack into a butter crock or on waxed paper, shape into 1 x7 inch log.  Chill or freeze.  Roll butter log in chopped parsley, if desired, before slicing into patties.

*  From the notes of Aunt Betty:  This zesty spread is easy to prepare and works magic on the most humble of dishes.  Butter may be frozen up to 6 months.

The simple things in life…. FRIED PORK CHOPS! lol

I haven’t been posting about food lately because, well, I’ve been uninspired.  Sadly, nothing I’ve found on Pinterest lately has been working. They look fantastic but taste dry or just plain gross. Recipes I see on WordPress don’t reach out and grab me (for the most part).  Maybe I’m in a slump?  Probably.

My slump is your gain!  God I crack myself up!  lol  No seriously, I don’t have a recipe that will blow your socks off but I DO have a great recipe for deep fried pork chops!  I don’t mind sharing with you my love for Ms Paula Deen, the Queen of Butter 🙂

 I’m not ashamed of my love for butter or simple food.  Hell, I pretty much love ALL types of food, it just has to taste great!  AND, BTW…  I’m not fat, in case you were wondering.  I think you should be able to enjoy a good pork cop (or stick of butter) in moderation 😉

Tonight, at MY house, we had deep fried pork chops (thanks to Paula) and garlic mashed potatoes (can I tell you that I use real cream in my taters?) with broccoli and LOTS of butter.  I wonder why my hubby won’t even try to lose weight?  Guess I’m not helping matters BUT!!!!  But why can’t you eat what you want sometimes and exercise a little so that you CAN enjoy a pork chop every now and then?  lol  BTW…  these were SO tasty and delicious.  It’s not like I needed a recipe for fried pork chops because this is something that I could do in my sleep.  I just wanted to see how OTHER people did chops.  Who better to consult than the Southern Lady and her Sons!?

Lady and Son’s Fried Pork Chops           Fried Pork Chops

Ingredients 

4 cups vegetable oil
8 (8-ounce) bone-in pork chops, about 1-inch thick
1 1/4 teaspoons salt
1 1/4 teaspoons freshly ground black pepper
3 teaspoon garlic powder
1 pinch cayenne pepper
1 pinch celery seeds
2/3 cup buttermilk  (*I used about a cup)
1 1/3 cups all-purpose flour

Directions

Heat oil in a deep skillet to 350 degrees F.

Arrange the pork chops in a large shallow dish. Season each pork chop, on both sides, with salt, black pepper, garlic powder, cayenne pepper and celery seeds. Pour the buttermilk over the chops and turn to coat.

Place flour into a large shallow dish. Dip each pork chop into the flour mixture and coat well, shaking off the excess.

Using tongs, gently lower the chops into the deep skillet in batches if necessary. Fry for 8 to 10 minutes or until golden brown, turning once. Transfer chops to a paper towel-lined pate to drain. Serve hot.

And there you go!  Simple, easy and it didn’t take a lot of time.  Probably the only downfall, besides the almost half a can of Crisco I used, was the amount of cleaning that my teenage munchkin had to do afterward.  lol  It’s not fun to do greasy dishes with wet flour dried to them 😦  BAD mom!  What do YOU do when you’re uninspired?

President Ford’s Braised Eye of Round Steak …. is what’s for dinner!

It’s just me and the hubby at home today cause the munchkin is visiting her daddy for the weekend.  I look forward to cooking on these “just for 2” kinds of weekends.

So I had beef eye of round steaks.  What to do with them?  They’re a tougher, less expensive cut of meat so I knew I’d have to cook the heck out of them but I’m SO tired of making “Swiss steaks” with this cut.  

This is what I found and it was absolutely delicious and PACKED with flavor!  Give it a try, I’m pretty sure you won’t be disappointed 😉  Btw…  the note said that former US president Gerald Ford requested this dinner regularly.  It was his favorite.

President Ford’s Braised Eye of Round Steak

Ingredients

2 TBSP Extra Virgin Olive Oil

2 large onions, sliced thin 

4 eye of round steaks, about an inch thick

1/4 tsp dried thyme

1/8 tsp garlic powder

1 tsp salt

1/4 cup flour for coating

1 cup beef consomme, undiluted (I used 1 can of Cambell’s beef consomme)

1 cup burgundy wine

1 tsp chopped parsley, optional (can be fresh or dried for garnish)

Directions

Heat oil in a large skillet over medium high heat.  Add onions and cook for about 5 minutes but don’t brown them (just long enough to soften and let the juices run).  Remove onions from skillet using a slotted spoon and set aside in a bowl.  Season the steaks with thyme, salt and garlic powder on both sides.  Rub in seasoning.  Dust steaks lightly with flour on both sides.  Fry steaks in skillet over medium high heat until brown on both sides, about 5 minutes per side.

Pour beef consomme and burgundy wine over steaks and return onions to skillet as well.  Cook over medium high heat until aroma of wine dissipates, about 2 to 3 minutes.  Reduce heat to low, cover and simmer for approximately 1 hour, or until steaks are fork tender.

Serve over rice, potatoes or egg noodles.  I made my porcini risotto YUMMMMMMMMM!

Individual Amish Beef Potpies

I’m feeling a little under the weather right now, be that as it may, dinner still has to be made, right?  I mean, if we want to eat, that is.  So what do I do when my heart isn’t really in it?  All I know is that I have a package of ground beef and I’m pretty disappointed with the recipes on Pinterest lately… SO I dug out one of the 100,000 cookbooks (yes, I collect cook books the way I collect shoes!).  This recipe comes from The Homestyle Amish Kitchen Cookbook, Harvest House Publishers.  I grabbed my daughter and we went to work making:

Individual Beef Potpies

1 beef bouillon cube

2 cups boiling water

3 1/2 cups cooked beef or cooked hamburger (*I used 1 1/2 lb ground beef)

2 tsp Worcestershire sauce

1 1/2 tsp salt (*I used 2 tsp)

1 tsp sugar

1/2 tsp paprika

1/4 tsp pepper

1 package frozen mixed vegetables (*I used California Blend – Green Giant)

1/4 cup flour

pastry (see below)

Dissolve the bouillon cube in the 2 cups boiling water and add the beef, Worcestershire sauce, salt, sugar, paprika, and pepper.  Add the frozen vegetables and cook mixture for 5 minutes.  Combine the flour with enough water to make a thin paste and slowly add it into the meat and vegetable mixture.  Continue stirring and cooking until mixture thickens.  Keep warm.  When you have made the pastry, spoon the meat and vegetable mixture into 6 individual oven-proof custard cups or ramekins that are 6 to 8 ounces each.  Do not overfill (like I did!  lol)

Pastry

1 cup flour

1/2 cup cornmeal

3/4 tsp salt

1/3 cup shortening

4 TBSP cold water (I had to use about 8 TBSP)

Sift together the flour, cornmeal and salt.  Cut in the shortening with a pastry blender or fork until the mixture resembles coarse crumbs.  Sprinkle the water by tablespoonfuls over the mixture and stir lightly with a fork until just damp.  Then, using your hands, work dough gently and as little as possible until the dough holds together and forms a ball.  You might need to add a bit more cold water.

Divide dough into 6 parts and roll each to form a ball large enough to fit over the top of the meat and vegetables in each baking cup.  (Julia and I patted them kind of flat like you’d do if you were making hamburger patties).  Turn under and crimp edges.  Make several cuts (or make a cross) in the pastry to allow steam to escape while baking.

Bake at 450 for 12-14 minutes


On the Superbowl Menu?

As I’m being constantly reminded…. Super Bowl is only a few days away!  What will you be making?  Here’s one of my ideas.  I’ve made this time and time again and it’s ALWAYS so freaking delicious.  Here’s the catch:  Make more than one batch because TRUST me, you’ll go through them.  I usually make 3 batches and they’re STILL all gone.  Oh and use tortilla SCOOPS.  It makes stuffing a whole lot easier.  So with no further ado, I bring you ……. (oh and as always, my notes are notated with a * and parenthesis)

Roast Chicken-Chipotle Nachos with Cilantro-Avocado Crema

Roast Chicken-Chipotle Nachos with Cilantro-Avocado Crema Recipe

Ingredients

  • 1 tablespoon olive oil
  • 1/2 teaspoon cumin seeds (*I just used 2 tsp cumin)
  • 1/2 teaspoon dried oregano
  • 1 to 2 canned chipotle chilies, chopped
  • 2 tablespoons tomato paste
  • 1 tablespoon white wine vinegar
  • 2 cups bite-size shreds skinned cooked chicken (*I used a store bought rotisserie chicken because it’s SO much easier)
  • 24 corn tortilla chips (2 3/4 in. wide) (**I use scoops)
  • 1 1/2 cups shredded jack cheese (6 oz.) *(I have always used cheddar and it’s SO tasty)
  • Cilantro-Avocado Crema (recipe follows)
  • 24 fresh cilantro leaves

Preparation

  1. 1. In a 2 1/2- to 3-quart pan over medium-high heat, frequently stir onion in olive oil until onion begins to brown, 4 to 7 minutes. Add cumin seeds and oregano; stir until fragrant, about 30 seconds. Add chilies, tomato paste, vinegar, and 1/2 cup water; bring to a boil, then reduce heat and simmer gently, stirring often, to blend flavors, about 5 minutes. Add chicken and stir until hot.
  2. 2. Meanwhile, arrange tortilla chips in a single layer in a 12- by 17-inch pan. Sprinkle equal portions of cheese on each chip and spoon about 1 tablespoon chicken mixture on top.
  3. 3. Bake in a 450° regular or convection oven until cheese begins to bubble, about 3 minutes. With a spatula, carefully transfer tortilla chips to a platter. Top each with 1 teaspoon Cilantro-Avocado Crema and garnish with a cilantro leaf. Serve warm.
  4. Cilantro-Avocado Crema. In a small bowl, mix 1/3 cup finely diced firm-ripe avocado, 2 tablespoons sour cream, 1 tablespoon finely chopped fresh cilantro leaves, 2 teaspoons lime juice, and 2 teaspoons milk. Add salt to taste. Makes about 1/2 cup.

Zero’s Chili (reblogged)

Today’s a PERFECT day for chili in the great Midwest!  I decided to try a different recipe from a blog I’m following.  http://captainofcuisine.wordpress.com/2013/01/25/zeros-chili/comment-page-1/#comment-330 Here’s the link but I’ve also copied and pasted his recipe and made notations with the changes I made.  This is a wonderful base recipe and I’ll definitely be using it as a regular!  Hope you enjoy!  Oh and Thanks to weckeman for sharing!
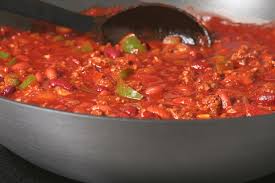
Zero’s Chili

Ingredients-

– 3 Pounds of ground round (or meat loaf mix, ground sausage or a combination of any the 3, your choice.  For vegetarians, 3 pounds of Morningstar Farms Grillers crumbles (TVP) taste great!)

– 1 Large can of whole tomatoes (pureed) (Just put them in the blender)

– 1 Small cans of tomato paste

– 5 Cans of red kidney beans with liquid (10 to 12 ounce cans each)

– 2 packages of chili seasoning mix (I used taco seasoning cause that’s what I had)

– 4 Medium green peppers (diced small) (I only had 3 green peppers so that’s what I used)

– 3 Medium onions (diced small)

– 2 Caps fulls of white vinegar

– 2 Tablespoons of butter

– 1/2 Tablespoons of garlic powder

– 1/2 Tablespoon of gravy master (I used 1 TBSP)

– 3 Tablespoons of olive oil

– Salt and pepper (to taste)

– 3 Teaspoons of ground cumin  (I added 4 tsp)

– A little water to thin to desired consistency (optional)

***I added 3 to 4 canned chipoltles in adobo sauce for extra heat.  It still didn’t make the chili TOO hot

****I also added 1 TBSP chili powder

Instructions-

1. Clean, chop, prepare and arrange all ingredients.

2. In a large heavy saucepan, brown meat (or meatless meat) while breaking it down with a spatula.

3. When meat is all browned and broken down to it’s smallest form, begin to drain all the fat you can.

4. Add pureed tomatoes and paste, chili mix and 1 cup of water and bring it to a simmer- stirring frequently.

5. Lightly coat a frying pan with olive oil and begin to sauté your peppers and onions until slightly limp and translucent.  Then add them to the chili

6. Add 1 cup of boiling water to the frying pan and de-glaze to get any remaining flavor. Add to the chili

7. Add all other ingredients except the beans and their liquid to the chili.

8. Simmer, stirring occasionally for at least 1 hour.

9. Add beans and liquid and continue simmering for another half an hour.

10. Serve with grated cheddar or parmesan cheese, Italian bread, ice cold beer and Sriracha.  Some people prefer it over rice.  Enjoy!


Salty Caramel and Pecan and Oatmeal Cookies (OR, When you come to my door, bring cookies!)

I had a nice little surprise visit from my mother a few minutes ago.  Truthfully, her visits can be a little stressful for me due to her constant judgement of whatever it is that I’m doing at the moment BUT NOT this time!  THIS time, she brought cookies!  VERY tasty cookies.  Mom got the recipe from http://www.midwestliving.com/recipe/salty-caramel-and-pecan-oatmeal-cookies/ but made a few of her own adjustments.  These are too good not to share so without further ado, I bring you my mother’s oatmeal cookies!  Probably the best oatmeal cookies I’ve ever tasted and I’ve tasted PLENTY.

Salty Caramel and Pecan Oatmeal Cookies

Salty Caramel and Pecan Oatmeal Cookies 


ingredients

  • 1 cup butter, softened
  • 1 cup granulated sugar
  • 1 cup packed dark brown sugar
  • 1 teaspoon salt
  • 1 teaspoon baking powder
  • 1 teaspoon ground cinnamon
  • 1/2 teaspoon baking soda
  • 2 eggs
  • 2 teaspoons vanilla
  • 1 1/2 cups all-purpose flour
  • 3 cups rolled oats
  • 1 11 – ounce package caramel baking bits
  • 1 cup pecans, toasted and coarsley chopped (she used chopped almonds cause that’s what she had on hand)
  • Coarse sea salt (She completely omitted the sea salt because she thought it would be too salty – I personally think it would be better with it but clearly, they were still delicious without!)

directions

  1. In a large mixing bowl, beat butter with an electric mixer on medium to high speed for 30 seconds. Add granulated sugar, brown sugar, 1 teaspoon salt, the baking powder, cinnamon and baking soda. Beat until combined, scraping sides of bowl occasionally. Beat in eggs and vanilla until combined. Beat in as much of the flour as you can with the mixer. Using a wooden spoon, stir in the remaining flour. Stir in oats, caramel baking bits and pecans.
  2. Using a small ice-cream scoop or a tablespoon, drop 1 1/2-inch mounds of dough 2 inches apart onto cookie sheets lined with parchment paper. Sprinkle with coarse sea salt.
  3. Bake in a 350 oven for 11 to 12 minutes, until the edges are light brown. (Centers will look undercooked.) Cool on cookie sheets for 3 to 4 minutes or until cookies can be easily removed. Transfer to a wire rack; cool.

nutrition facts

(Salty Caramel and Pecan Oatmeal Cookies)

Mark as Free Exchange () 0, Potassium (mg) 49, sodium (mg) 421, carb. (g) 21, iron (mg) 1, pro. (g) 2, cal. (kcal) 145, vit. A (IU) 146, Thiamin (mg) 0, Niacin (mg) 0, sugar (g) 14, Riboflavin (mg) 0, Folate (µg) 12, fiber (g) 1, Polyunsaturated fat (g) 1, Pyridoxine (Vit. B6) (mg) 0, calcium (mg) 20, Monosaturated fat (g) 2, sat. fat (g) 3, chol. (mg) 18, Fat, total (g)

Now here’s a little tip from me…  ALL cookies stay soft and chewy when stored with a slice of bread in the container!  For real.  You should try it!  The bread soaks up the moisture that would otherwise make the cookies hard!
Enjoy!